Blog

Your blog category

Kitchen Cabinets in San Diego

Pros and Cons of Painting Kitchen Cabinets in San Diego?

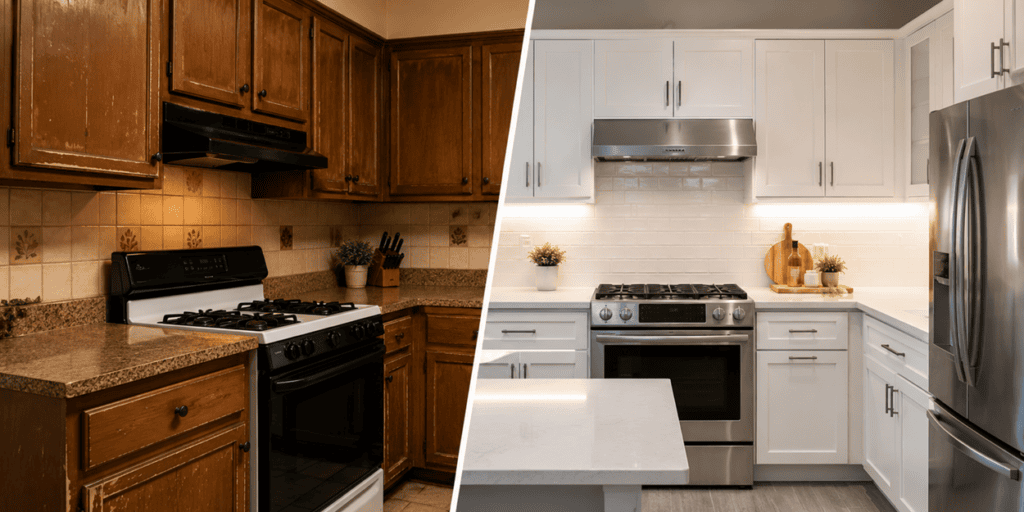
If your kitchen feels outdated but a full remodel is not in the budget, painting your cabinets can seem like the perfect middle ground. Many homeowners choose kitchen cabinet painting in San Diego because it delivers a dramatic visual upgrade without the cost, mess, and downtime of replacing cabinets altogether. But before you commit, it is worth understanding both the advantages and the drawbacks. Let’s check them out! Why Do Homeowners Choose Kitchen Cabinet Painting in San Diego? If your cabinets are still sturdy and the layout works for your family, painting can completely change the look of your kitchen without the cost and disruption of replacement. Many homeowners are surprised by how much brighter and cleaner a kitchen feels after a cabinet makeover. White, warm beige, soft green, and navy remain popular choices because they can make older cabinets look far more current. Another reason people choose cabinet refinishing in San Diego is cost. Replacing cabinets means demolition, disposal, installation, and often additional repairs. Painting avoids most of that. What Are the Benefits of Kitchen Cabinet Painting? A few reasons homeowners choose this route include: Lower cost compared to replacement Faster project timeline Less mess in the home Opportunity to update the kitchen’s style Better use of cabinets that are still in good condition When done correctly, painted cabinets can look surprisingly close to new. What Are the Potential Drawbacks of Painted Kitchen Cabinets? This is where expectations matter. Paint can improve appearance, but it cannot fix cabinets that are falling apart. If doors are warped, boxes are damaged, or moisture has caused long-term issues, painting may only hide the problem temporarily. Painted cabinets also experience wear over time. Around handles and corners, small scratches or chips can eventually appear, especially in busy family kitchens. That’s why many homeowners hire an experienced kitchen cabinet painter rather than treating it as a weekend DIY project. The prep work often determines how long the finish lasts. Final Thoughts For many homes, hiring professional kitchen cabinet painters in San Diego is a practical way to refresh a kitchen without taking on a full renovation. The key is being realistic about what paint can and cannot do. If your cabinets are still solid and you’re simply tired of the way they look, a professional cabinet painting project from San Diego House Painting (American Painting) could give your kitchen a completely new feel without the cost of starting from scratch. So, book a consultation today!

Pros and Cons of Painting Kitchen Cabinets in San Diego? Read More »

Professional Painters San Diego

Common House Painting Mistakes San Diego Homeowners Should Avoid

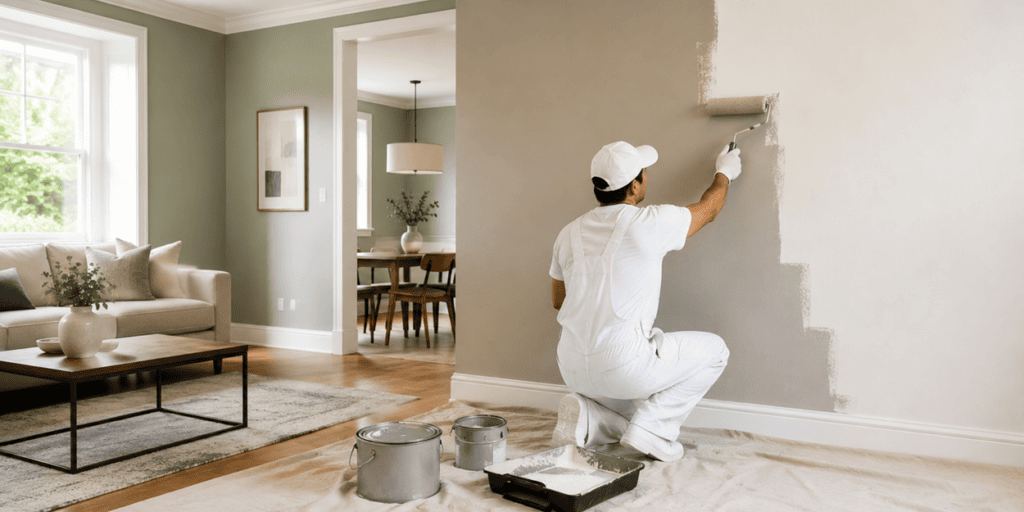
A fresh coat of paint can completely change how your home looks and feels. It can make an older property look newer, boost curb appeal, and even protect your home from wear and tear. But you should know that a bad paint job is often more expensive than waiting and doing it right the first time. Whether you’re planning a DIY project or hiring professionals for house painting in San Diego, avoiding common mistakes can save you time, money, and frustration. Many painting failures don’t happen because of poor-quality paint. They happen because important steps get skipped, rushed, or overlooked. Let’s look at the most common house painting mistakes San Diego homeowners should avoid. Why Do So Many Paint Jobs Fail Early? Most homeowners focus on paint colors and finishes. Professionals focus on preparation. Painting experts often say that the majority of a successful paint job happens before the first drop of paint touches the wall. That’s because paint can only perform as well as the surface underneath it. When prep work gets rushed, problems like peeling, bubbling, cracking, and uneven coverage often appear much sooner than expected. Are You Skipping Surface Preparation? This is probably the biggest mistake homeowners make. It can be tempting to jump straight into painting, especially when you’re excited about updating your home. But painting over dirty, damaged, or glossy surfaces rarely ends well. Before painting, surfaces should be: Cleaned thoroughly Free from dust and grease Scraped if old paint is peeling Sanded where necessary Patched and repaired Properly caulked around gaps and trim For projects of exterior painting in San Diego, preparation becomes even more important because dirt, salt air, moisture, and UV exposure can affect how well paint adheres. Skipping prep may save a day now, but it often leads to repainting much sooner. Can Using Cheap Paint Save You More Money? Everyone loves saving money. But choosing the cheapest paint available can be costly in the long run. Lower-quality paints often require more coats, fade faster, offer weaker coverage, struggle against moisture and sunlight, and wear out more quickly. San Diego’s climate presents unique challenges. Homes are exposed to strong sunlight for much of the year, and exterior surfaces need coatings that can handle UV exposure. Instead of focusing solely on price, look at durability, coverage, and suitability for your specific project. Do You Really Need Primer Before Painting Your Home? Many homeowners assume modern paint-and-primer combinations eliminate the need for a separate primer. Sometimes that’s true. But many situations still require a dedicated primer, including: Bare Surfaces: New drywall, wood, and patched areas often absorb paint unevenly without primer. Major Color Changes: Painting a light color over a dark wall or vice versa usually requires a proper primer for consistent results. Stains and Water Damage: Primer helps block stains from bleeding through fresh paint. Exterior Repairs: Areas exposed to moisture often benefit from specialized primers designed to improve adhesion and durability. Skipping primer may save money initially, but it often leads to uneven coverage and shorter paint life. Which Paint Finishes Work Best in High-Traffic Areas? One common mistake during projects of interior painting in San Diego is selecting finishes based solely on appearance. Here’s a simple guide: Flat Finish Flat finish works best for: Ceilings Low-traffic areas Walls with imperfections Eggshell or Satin Eggshell or Satin finishes look good in Living rooms Bedrooms Hallways Semi-Gloss A semi-gloss paint finish can be used for Kitchens Bathrooms Trim and doors High Gloss Like a semi-gloss paint finish, high gloss can be used to paint: Accent details Cabinets Decorative woodwork Using the wrong finish can make walls harder to clean or highlight imperfections you never noticed before. How Can San Diego Weather Affect Your Exterior Paint Job? This mistake affects many exterior projects. San Diego enjoys relatively mild weather, but conditions still matter. Avoid painting when: Temperatures are too hot Humidity is unusually high Rain is expected Surfaces are damp Extreme heat can cause paint to dry too quickly, creating brush marks and uneven coverage. Moisture can lead to adhesion problems and premature failure. Timing matters just as much as technique. Can Paint Hide Cracks, Dents, and Wall Damage? Paint is not a magic cover-up solution. Many homeowners assume paint will hide all cracks, dents, nail holes, water damage, and uneven surfaces. Unfortunately, paint often makes these issues more noticeable. It is important to take a few steps before painting: Fill holes and cracks. Repair damaged drywall. Replace rotten wood. Address moisture issues. Smooth the rough areas. A smooth surface creates a professional-looking finish. How Can You Tell if Water Damage Needs Repair Before Painting? This is one of the most expensive mistakes homeowners can make. If you notice water stains, mold, mildew, or damp spots, don’t simply paint over them. The underlying moisture problem must be fixed first. Otherwise, the issue will continue behind the paint, eventually causing peeling, discoloration, and additional repairs. Address the source of moisture before investing in new paint. Are Cheap Brushes and Rollers Ruining Your Paint Finish? Quality tools make a bigger difference than many people realize. Low-quality brushes and rollers often leave brush marks, roller lint, uneven coverage, streaks, and more. Good tools help paint apply more smoothly and evenly. They also make the job faster and less frustrating. You don’t need the most expensive equipment available, but bargain-bin tools often produce bargain-bin results. How Should You Test Paint Colors Before Making a Final Decision? Paint colors rarely look exactly like they do on a small sample card. Lighting changes everything. Before committing to a color: Test samples on multiple walls View them during morning and evening light Check how they look with your flooring and furniture Evaluate them on sunny and cloudy days This is especially important in San Diego, where natural sunlight can dramatically change how colors appear. A color you love in the store may feel completely different once it’s on your walls. Should You Tackle House Painting Yourself or Hire a

Common House Painting Mistakes San Diego Homeowners Should Avoid Read More »

Professional Painters in San Diego - American Painting

Benefits of Hiring Professional Painters in San Diego (2026 Guide)

Painting your home sounds simple. Buy paint, grab a roller, and start working. But the reality is far from it. Painting is one of the most underestimated home improvement projects homeowners take on. Between preparation, material selection, safety risks, weather conditions, and finishing quality, a paint job can either transform your home or quietly ruin it. That’s exactly why more homeowners today choose professional painters in San Diego instead of going the DIY route. This guide breaks down why hiring professionals isn’t just convenient but often the smarter financial and long-term decision. Why Professional House Painting Matters for San Diego Homes? The San Diego environment is notoriously harsh on exterior surfaces. Homes here face constant salt air and moisture with scorching heat and high UV indexes. UV Protection and Heat Reflection In 2026, paint technology has advanced significantly, offering specialized “cool” coatings designed to reflect infrared radiation. Professional teams understand which specific paint brands and tiers offer the highest thermal resistance. This is not just about aesthetics but about reducing the heat absorption of your home, which can lead to lower cooling costs during the peak of summer. Coastal Moisture and Corrosion For those seeking exterior painting services in San Diego near the coast, the primary enemy is salt spray and high humidity. Without proper sealing and the use of maritime-grade primers, paint will bubble, peel, and flake within eighteen months. Professionals utilize multi-stage preparation processes that include power washing to remove salt deposits and applying high-adhesion primers that create a moisture barrier. How to Achieve a Flawless Finish with Interior Painters in San Diego, CA? Interior painting is often underestimated as a simple weekend project. However, achieving a flawless finish requires more than a roller and a tray.  Surface Preparation The difference between a good paint job and a professional one is found in the hours spent before a brush even touches the wall. This includes: Drywall Repair: Filling micro-cracks, sanding down imperfections, and ensuring a perfectly level surface. Degreasing: Especially in kitchens and high-traffic areas, walls accumulate oils that prevent paint from bonding correctly. Professionals use industrial-strength cleaners to ensure a clean slate. Precision Masking: Using high-grade tapes and drop cloths to ensure that lines are razor-sharp at the ceiling and baseboard junctions. Texture Matching Many San Diego homes feature specific drywall textures, such as orange peel or knockdown. If a patch is made or a wall is moved during a renovation, matching that texture is a specialized skill.  Professional painters have the equipment and the eye to blend new paint into existing textures so the transition is invisible. Maximizing ROI with Quality House Professional Painting Services  While the upfront cost of hiring a crew is higher than buying a few gallons of paint yourself, the long-term ROI (Return on Investment) is substantial. Efficiency and Time Management For most homeowners, painting a full house can take weeks of weekends and evenings. A professional crew can often complete the same scope of work in three to five days.  Material Longevity A DIY paint job typically lasts 3-5 years before showing signs of wear. A professional application, using commercial-grade products and correct layering techniques, can last 10-12 years. By doubling or tripling the lifespan of the paint job, the cost per year is significantly lower when hiring professionals. How to Evaluate Affordable Painters in San Diego? The term affordable does not mean cheap. When looking for affordable painters in San Diego, the goal is to find value. Value is found in companies that offer comprehensive warranties, carry full liability insurance, and provide transparent bidding. A low-ball estimate from an unlicensed contractor often results in hidden costs, such as the need for a total redo within two years or damages to furniture and flooring that are not covered by insurance. Safety and Liability: Why DIY Painting Isn’t Worth the Risk? Painting, particularly exterior work, involves significant risks like: Ladder Safety: Falls from heights are a leading cause of home improvement injuries. Professionals are trained in OSHA-compliant ladder safety and use specialized scaffolding or lifts for hard-to-reach peaks. Lead and Hazardous Materials: For older homes, the presence of lead-based paint is a serious concern. Professional contractors are certified in lead-safe work practices, ensuring that dust and chips are contained and disposed of according to strict environmental regulations. Insurance Peace of Mind: If a DIYer falls off a ladder or spills five gallons of paint on a neighbor’s car, they are personally liable. A professional company carries general liability and workers’ compensation, protecting the homeowner from any financial fallout from accidents. Boosting Property Value in the 2026 San Diego Real Estate Market Buyers in 2026 are very smart. They can spot a DIY paint job from the curb. Sloppy edges, visible brush strokes, and flashing (where the paint sheen is inconsistent) are red flags that suggest a lack of overall home maintenance. A professional paint job provides a clean look that signals to buyers that the home has been meticulously cared for. This often results in higher offers and shorter days on market. High-quality house painting services in San Diego provide the ultimate finishing touch that bridges the gap between a house and a high-value asset. Advanced Equipment Used by Professional Painting Crews The tools used by professional crews go far beyond the standard brush and roller found at a local hardware store. Airless Sprayers: These allow for a uniform, glass-smooth finish on exterior siding and large interior walls, which is impossible to achieve by hand. HEPA Vacuums: Integrated into sanding equipment to ensure that your home remains dust-free during the preparation phase. Moisture Meters: Professionals use these to check the thirst of the wood or stucco before applying paint, ensuring the surface is dry enough for a permanent bond. Selecting the Best Local Painters for Your Home When you decide to move forward with a project, it is vital to vet your contractors. Look for local expertise and a proven track record of handling the specific architectural styles. Reliability is the

Benefits of Hiring Professional Painters in San Diego (2026 Guide) Read More »

Before and After Painted Cabinets Kitchen​ - American Painting

Best Paint for Kitchen Cabinets: How to Choose the Right Finish & Color?

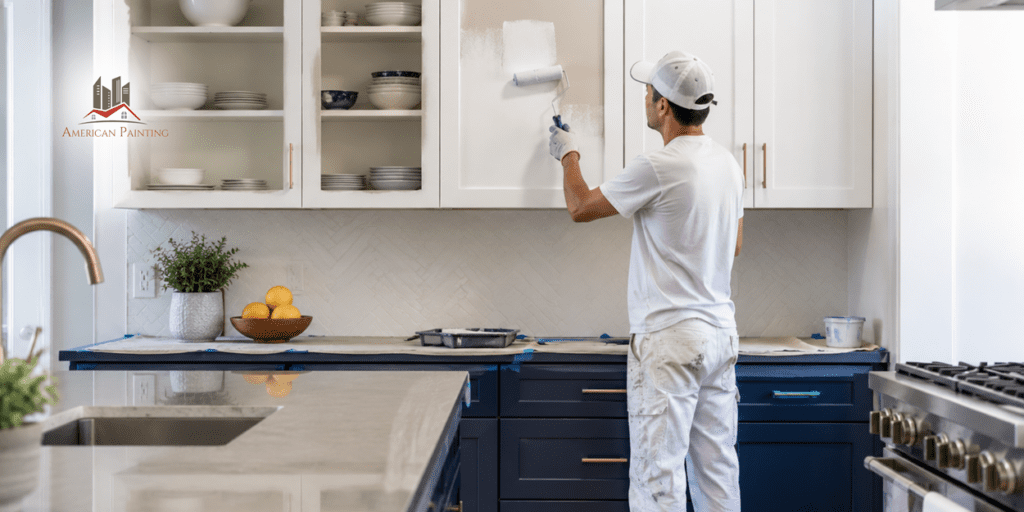
Kitchen cabinets take more abuse than almost anything else in your home. They deal with everything from heat and spills to fingerprints and grease daily. So choosing the right paint for kitchen cabinets isn’t about trends. It’s about durability, cleanability, and long-term results. This guide breaks it down simply, based on professional practices and real homeowner experiences. Why Kitchen Cabinet Painting Requires a Different Approach? Many homeowners assume that wall paint works everywhere. It doesn’t. Kitchen cabinet painting demands coatings that can handle: Constant touching and scrubbing Moisture and cooking grease Temperature changes Daily wear and tear High-quality cabinet paints or enamel finishes last longer because they cure harder and resist stains better. Skipping this step is why many DIY projects chip within months. How to Choose the Right Paint Finish? The finish matters more than the brand. Semi-Gloss Finish  Highly durable Easy to clean grease and fingerprints Resists moisture well Reflects light for a fresh kitchen look Professionals often prefer semi-gloss because it balances durability with maintenance needs. However, it can highlight dents or imperfections. Satin Finish Softer, modern appearance Hides surface flaws better Still washable and practical Many homeowners prefer satin because it looks smoother and less shiny while still being functional for cabinets. If your cabinets aren’t perfectly smooth, satin is usually safer. Best Paint Types to Paint Kitchen Cabinets When planning to paint kitchen cabinets, focus on performance instead of price. Top-performing options include: Acrylic enamel paint Cabinet-specific water-based paints Hybrid enamel coatings These dry harder, resist scratches, and hold color longer than basic interior paint. Avoid: Flat paint Standard wall paint Cheap contractor coatings They simply don’t survive kitchen conditions. Which Color is the Best for Your Kitchen Cabinets? Color selection isn’t just aesthetic. It also affects maintenance and resale value. Safe & Timeless Choices Warm white Soft greige Light gray Cream tones These create the most dramatic before-and-after painted cabinets kitchen transformations because they reflect light and make spaces feel larger. Bold Choices Navy blue Forest green Matte black islands Use darker colors on lower cabinets or islands to avoid overwhelming the space. Always test samples in morning and evening light before committing. How to DIY Kitchen Cabinet Painting? Successful kitchen cabinet painting follows a strict order: Remove doors and hardware Deep-clean the grease buildup Sand or degloss surfaces Apply bonding primer Use thin, multiple paint coats Allow proper curing time Most failures happen because people rush drying or skip primer. Wrapping Up The best paint for kitchen cabinets combines durability, cleanability, and timeless color. Satin or semi-gloss finishes paired with cabinet-grade paint almost always deliver the best long-term results. If your kitchen feels outdated, you don’t need a renovation; you need the right paint strategy. Because when done right, painting cabinets isn’t just cosmetic. It completely transforms how your kitchen looks, feels, and functions. So, plan your colors, invest in quality paint, and give your cabinets the upgrade they actually deserve.

Best Paint for Kitchen Cabinets: How to Choose the Right Finish & Color? Read More »

Oil Based Paint Vs Water Based Paint - American Painting

Oil-Based Paint vs. Water-Based Paint: Pros, Cons & Expert Recommendations

Choosing paint sounds simple until you stand in front of hundreds of cans labeled oil, latex, acrylic, interior, exterior, premium, and pro-grade. One of the biggest decisions homeowners face is oil based vs water based paint, and honestly, choosing wrong can cost you time, money, and a repaint far sooner than expected. This guide breaks everything down clearly, using real professional experience, contractor insights, and practical homeowner lessons so you can make the right choice. Let’s get started! Understanding the Basics: What Is Oil-Based vs. Water-Based Paint? Before comparing performance, let’s simplify what these paints actually are. Oil-Based Paint Oil-based paint uses natural or synthetic oils as the binder. It cures through oxidation, meaning it hardens slowly as it reacts with air. Traditionally, it was the gold standard for durability and glossy finishes. Common uses: Trim and doors Cabinets Metal surfaces High-traffic areas Water-Based Paint Water-based paint uses water as the carrier instead of oil solvents. Modern formulas have improved dramatically over the last decade and now dominate residential painting. Types include: Water-Based Acrylic Paint Water-Based Latex Paint Water-Based Exterior Latex Paint Today, most professional painters reach for water-based products first, and there’s a good reason why. Oil-Based Paint vs. Water-Based Paint: The Core Differences Let’s compare where each paint actually performs. The biggest shift in the industry? Modern water-based acrylic paint now rivals oil paint in durability without the downsides. Pros of Oil-Based Paint Extremely Smooth Finish: Oil paint levels beautifully while drying, which reduces brush marks. It is best for cabinet refreshing, furniture restoration, and detailed trim work. Hard Protective Surface: Once cured, oil paint forms a tough shell resistant to dents and scratches. Strong Adhesion: It sticks well to older painted surfaces without heavy priming. Cons of Oil-Based Paint Here’s where many homeowners regret their choice. Long drying time (sometimes 24+ hours) Strong fumes require ventilation Difficult cleanup Higher environmental restrictions Yellowing over time, especially indoors Many professionals now limit oil paint to specialty situations rather than whole-house projects. Why Water-Based Paint Has Become the Industry Standard? Technology changed everything. Modern water-based latex paint and acrylic blends solved the traditional weaknesses water-based paints once had. Faster Project Completion You can apply multiple coats in one day. For Interior House Painting in San Diego, this means: Less disruption Faster room turnaround Lower labor costs Flexible Finish That Moves With Your Home Homes expand and contract with temperature changes. Oil paint becomes brittle, while water-based coatings flex instead of cracking. Better Color Retention Water-based paints resist fading and chalking under sunlight. That’s why professionals frequently recommend water-based exterior latex paint for coastal and sunny climates. Easier Application Even DIY homeowners get better results when painting with water-based paint because it spreads evenly and forgives small mistakes. Which Paint To Use for Interior Projects? When planning interior house painting in San Diego, climate and lifestyle matter. Water-Based Paint Wins For: Living rooms Bedrooms Kitchens Walls and ceilings Modern trim systems The reasons behind are simple. Water-based paints have low odor, are quick drying, and are easier to maintain. Oil paint is now mostly reserved for: Antique woodwork Specialty cabinetry Certain high-gloss decorative finishes Exterior House Painting: Which Paint Lasts Longer? For exterior house painting in San Diego, durability isn’t just about toughness; it’s about adaptability. Exterior surfaces face: UV exposure Moisture shifts Temperature swings Coastal salt air Oil paint hardens but becomes brittle. Over time, it can crack and peel. Water-based exterior coatings: Expand and contract with siding Resist mildew better Hold color longer Allow moisture vapor to escape Professional painters overwhelmingly prefer water-based systems for modern exteriors. Water-Based Acrylic Paint vs Water-Based Latex Paint Many homeowners assume these are identical, but they’re not. Water-Based Acrylic Paint Premium resin formula Strong adhesion Excellent durability Best for exterior surfaces and high-end interiors Water-Based Latex Paint More affordable Easy application Ideal for walls and ceilings Acrylic is essentially an upgraded version used when longevity matters most. Expert Recommendations: When to Choose Each Paint? Choose Oil-Based Paint When: Painting cabinets requiring ultra-smooth gloss Restoring older wood surfaces Coating metal railings or specialty finishes Choose Water-Based Paint When: Painting walls or ceilings Updating interiors Painting exteriors Working in occupied homes Speed and convenience matter Most experienced painters today use a hybrid strategy, oil only where necessary, water-based everywhere else. Common Mistakes Homeowners Make While Choosing House Paint Ignoring Climate: Coastal environments like San Diego demand breathable coatings, and oil paint struggles here. Mixing Paint Types Incorrectly: Switching from oil to water-based without a proper primer leads to peeling. Choosing Paint Before Choosing a Painter: An experienced house painter in San Diego, CA, understands surface prep, product compatibility, and long-term performance, not just color selection. The Verdict: Oil-Based Paint Vs Water-Based Paint Here’s the honest, expert-level takeaway: Oil paint is no longer the default choice. Water-based technology has surpassed it for most residential applications. Professionals now rely heavily on acrylic and latex systems for both interior and exterior projects. If this were 1995, oil paint might win, but in today’s painting world? Water-based paint dominates nearly every category that matters to homeowners. Final Thoughts: Making the Right Choice for Your Home Choosing between oil-based Paint or water-based paint isn’t about tradition; it’s about performance, lifestyle, and long-term results. for most homes: Water-based paints offer easier application Better durability in changing climates Faster project completion Healthier indoor environments Whether you’re planning a refresh inside your home or preparing for exterior house painting in San Diego, selecting the right paint and the right professional makes all the difference. If you’re unsure which paint system fits your project, consult an experienced local painter who evaluates surfaces, exposure, and goals before recommending products. Because a great paint job isn’t just about color. It’s about choosing smarter materials from the start. So, talk to a trusted professional, ask the right questions, and make a choice that protects your home for years and not just until the next repaint.

Oil-Based Paint vs. Water-Based Paint: Pros, Cons & Expert Recommendations Read More »

Best Time to Paint a House - American Painting

Interior vs Exterior House Painting: When is the Best Time to Paint Your Home?

Painting your home sounds simple. Pick a color, grab a brush, and start. In reality, timing can make or break the results. The best time to paint depends on whether you’re painting the interior or the exterior of your house. Weather, humidity, and temperature all affect how paint dries, sticks, and lasts. Let’s break it down clearly so you don’t waste time, money, or effort. What is the Best Time to Paint a House Exterior? The golden rule for painting an exterior house is consistency. Most modern paints require specific conditions to bond correctly to a surface. You are looking for a string of dry days where temperatures stay between 50°F and 85°F. Low Humidity: If it’s too humid, the paint won’t dry. If it’s too dry or windy, it might dry too fast, leading to brush marks. Temperature Stability: You need a zone where the temperature doesn’t fluctuate more than 20 degrees between day and night. In regions with Mediterranean climates, the late spring and early fall are the sweet spots. These windows avoid the unexpected winter rains and the blistering heat of July and August that can cause house exterior paint to dry prematurely and crack. When to Start Interior House Painting? Unlike exterior work, interior house painting offers significantly more flexibility because you control the environment. However, professional interior painting services still recommend specific timing for optimal results. The Advantage of Winter for Interior House Painting Many homeowners assume summer is best for all DIY projects, but winter is actually the premier season for interior upgrades. Lower Humidity: Indoor air is typically drier in the winter, which allows paint to cure faster and harder. Ventilation: Modern low-VOC (Volatile Organic Compounds) paints mean you don’t need to leave windows wide open for days, making it easier to paint when it’s cold outside. How to Choose the Perfect Interior/Exterior House Colors? When selecting house colors, remember that lighting varies by season. A color that looks vibrant in the harsh summer sun might look muddy during a grey winter. Always test your swatches in both natural and artificial light to ensure the pigment holds its integrity year-round. Transform Your Home with American Painting! The right paint job isn’t just about picking beautiful house colors. It’s also about timing, preparation, and expert application. Whether you’re planning to paint the interior or exterior of your house, doing it at the right time ensures the finish looks better and lasts longer. If you want reliable, professional results, working with experienced painters makes a big difference. Teams like American Painting understand how proper surface preparation and the right timing can completely transform a home. They can also guide you on the best schedule for your project and help you achieve a clean, durable finish. So, start planning your painting project today and give your home the fresh, lasting look it deserves.

Interior vs Exterior House Painting: When is the Best Time to Paint Your Home? Read More »

How to Choose the Best Sherwin Williams Cabinet Paint for Your Kitchen 1

How to Choose the Best Sherwin-Williams Cabinet Paint for Your Kitchen?

The kitchen is the high-traffic heart of the home, which means your cabinets are functional surfaces subjected to constant grease, heat, moisture, and physical impact. If you choose the wrong cabinet paint, you’ll likely be staring at peeling edges and fingerprint stains within six months.  While you will find a ton of quality options within the Sherwin-Williams catalog, the best paint isn’t a universal choice. It depends entirely on your application method and the specific durability your lifestyle demands. In this guide, you’ll find the different high-performance coatings available to help you identify the right Sherwin Williams cabinet paint for your specific project. Let’s get started! Comparing the Best Sherwin-Williams Cabinet Paint Options If you ask professional painters what Sherwin-Williams paint is best for cabinets, two products come up repeatedly. 1. Emerald Urethane Trim Enamel This is a water-modified alkyd. It behaves like an oil-based paint, which means it levels out beautifully to hide any marks. Plus, it easily cleans up with water. Pros: Can be brushed, rolled, or sprayed. It is extremely accessible for homeowners and creates a very hard, durable film. Cons: It can take weeks to reach its full chemical cure, meaning you have to be gentle with your cabinets for about a month. 2. Gallery Series Waterborne Topcoat (The Professional Choice) Released to bridge the gap between house paint and industrial coatings, Gallery Series is a 1K (single-component) polyurethane. Pros: It is KCMA (Kitchen Cabinet Manufacturers Association) rated. It dries to the touch in minutes and can be sanded or recoated in about 45 minutes. It is significantly more resistant to chemicals (like mustard or cleaner) than Emerald. Cons: It is spray-only. If you try to brush or roll the Gallery Series, it will dry too fast, leaving a mess of textures. Sherwin-Williams Best Paint for Kitchen Cabinets: Understanding the Tech The reason Sherwin-Williams cabinet paint stands out in the market is the focus on block resistance. Cheap latex paint remains slightly flexible and tacky even when dry. In a kitchen, this causes cabinet doors to stick to the frames, eventually ripping the paint off. Sherwin-Williams uses a cross-linking technology. As the water evaporates, the paint molecules lock together to form a shell that is much harder than standard wall paint. This hardness is what prevents chipping when a pot bangs against a drawer or when you’re scrubbing off dried mess. Top Trending Sherwin-Williams Kitchen Cabinet Paint Colors Choosing a color is subjective, but 2026 trends are moving away from stark, sterile whites and toward “organic sophistication.” Consider these top-performing shades: The New Neutrals Alabaster (SW 7008): This color belongs to the family of warm whites. It provides a clean look without that hospital feel. Shoji White (SW 7042): A creamy white that works perfectly in kitchens with natural wood accents. Moody & Bold Statements Iron Ore (SW 7069): A soft, charcoal grey that often replaces true black. It provides high contrast against brass hardware. Pewter Green (SW 6208): A dark, earthy green that brings a luxurious and historic feel to the kitchen. Naval (SW 6244): The definitive navy blue. It remains a staple for kitchen islands to create a polished look. Expert Tips for a Successful Kitchen Cabinet Painting  No matter how much you spend on your kitchen cabinet paint, the project will fail if your prep work is lazy.  1. Degreasing Kitchen cabinets are coated in a fine layer of aerosolized cooking oil. If you paint over this, the paint will never bond. You must use a heavy-duty degreaser or a dedicated citrus cleaner. Scrub until the slick of that grease is completely gone. 2. Sanding Properly You do not need to sand down to bare wood, but you must scuff the surface. The goal is to remove the shine from the existing finish so the new primer has something to stick to. Try to use 220-grit sandpaper because if the surface is still shiny, the paint will eventually peel off in sheets. 3. Priming Do not use paint and primer in one. For cabinets, you need a dedicated bonding primer. Extreme Bond Primer: Best for slick, factory-finished cabinets or laminate. B-I-N (Shellac-based): If you are painting over old oak or dark wood, you need this to stop tannin bleed (the yellow spots that ruin white paint). Kitchen Cabinet Painting: DIY vs. Professional Results If you are attempting to paint your kitchen cabinets yourself, stick to Emerald Urethane Trim Enamel. It is much more forgiving.  Professionals doing kitchen cabinet painting in San Diego or other high-end markets usually opt for the Gallery Series or even 2K (two-part) industrial coatings because they have the specialized spray equipment (HVLP or Air-Assisted Airless) to handle them. Why Spraying Paint is Better than Rolling? Spraying provides a factory finish because it eliminates the texture of a roller or brush. However, it requires 80% more masking and prep time. If you choose to roll, use a high-density foam roller and lay off the paint with a high-quality brush to minimize the orange peel texture. Maintenance Tips for Long-Lasting Kitchen Cabinet Paint Once the paint is applied, the clock starts on the cure time. For the first 7 days, avoid heavy cleaning or scrubbing. The next 30 days are the full cure window. After this, Sherwin-Williams’ top-tier enamels become scrubbable, meaning you can use mild soap and water to clean them without softening the finish. A common mistake people make is applying the paint too thickly. Multiple thin coats are always superior to one thick coat. Thick coats trap moisture, leading to a finish that stays soft and gummy for months. Wrapping Up Picking the right paint is one of the most important parts of painting kitchen cabinets. Cabinets go through a lot every day, so the paint needs to be strong, smooth, and able to handle regular use. Sherwin-Williams offers several paints made specifically for cabinets, which is why many homeowners and professionals trust them for this kind of project. But the paint alone isn’t what makes the

How to Choose the Best Sherwin-Williams Cabinet Paint for Your Kitchen? Read More »

Exterior House Painting San Diego CA

8 Mistakes Homeowners Make When Hiring Exterior House Painting Services

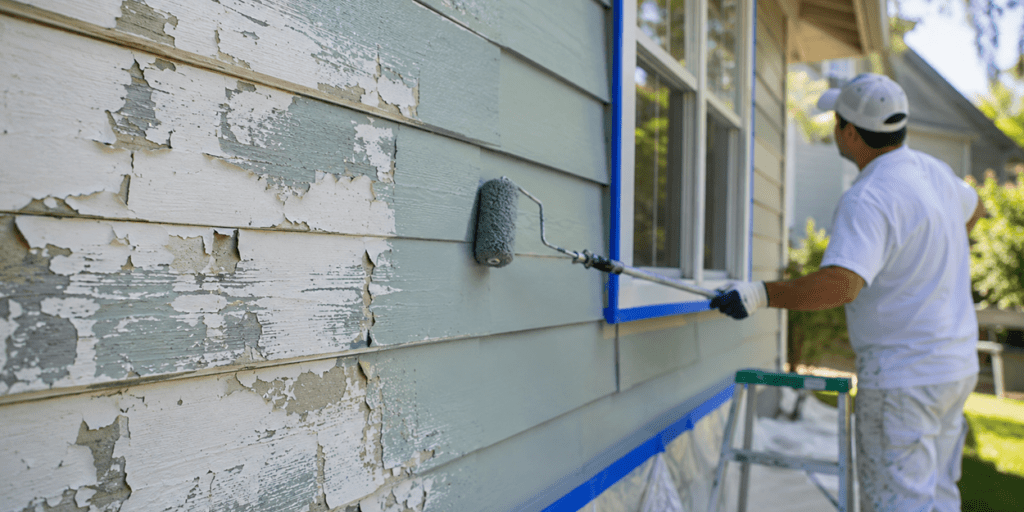
Your home is likely your largest financial asset. A proper paint job seals the surfaces, prevents moisture damage, and slows aging. Yet, when it comes to maintaining its exterior paint, ​many of us homeowners approach the task with a dangerous attitude of cost-cutting and misinformation. The result? Frustrating experiences, substandard results, and frequent do-overs.  If you are looking to refresh your house paint, you need to hire professional exterior house painting services to ensure that your home remains protected and beautiful. And to do that, you also need to avoid these common and heavy on the wallet mistakes, especially if you are someone who lives in San Diego. Let’s see what those mistakes are. Why Hiring the Right Painter Matters More than the Paint Brand? There is one thing that you should understand: cracking and peeling paint rarely happen because of paint quality. It happens because of poor preparation and application. Even premium coating fails if: Surfaces are dirty Moisture is trapped The wrong primer is used Sanding of the wall is not done properly Temperature conditions are ignored Professional painting is a technical service, not just a cosmetic one. A trained San Diego exterior house painter or any qualified professional in your region will focus more on preparation rather than just rolling on the paint. Things Not To Do While Choosing a Professional House Painter Choosing the Cheapest Bid Let’s be blunt: if one quote is $2,000 cheaper than the others, you aren’t getting a deal. You are probably being scammed. High-quality resins, pigments, and experienced labour are expensive.  When a so-called expert gives you a bottom-barrel price for exterior house painting in San Diego, CA, they are cutting corners. Usually, it’s by skipping the workers’ comp insurance, which puts your house at risk if they fall, or by using contractor-grade paint that is essentially colored water with zero UV resistance. Skipping Prep The biggest lie in the industry is that you can just scrape the loose paint and start painting. Ask any legitimate expert how to paint the exterior of the house correctly, and they’ll tell you that a great paint job is 70% preparation and 30% application. If your contractor isn’t doing the following, it’s time you call another: Pressure Washing: Simply spraying water isn’t enough. You need to kill the spores. If you paint over mildew, it will eat the paint from the inside out. Scraping & Sanding: Old and flaking paint must be sanded off to create a smooth and bondable surface for a new layer of paint. Priming: Skipping the primer before painting is a bad idea. It is essential because it acts as a glue between the substrate and the topcoat. Believing Paint Should Last 20-25 Years When asking how often to paint the house exterior, you cannot expect a single number. In a vacuum, it’s 7 years. In reality, it depends on your climate. If your home has zero shade and faces the south, you might need a refresh every 5 years to prevent the wood from cracking. If you wait until the paint is visibly failing, you’ve already lost. At that point, you aren’t paying for a paint job; you’re paying for a restoration, which costs three times as much. Hiring Without Local Expertise Searching for exterior house painting in San Diego requires finding someone who understands our specific environmental stressors. We deal with high UV indexes and salt-laden air. A contractor who moved here last month from the Midwest might try to use products that work in humidity but fail miserably under the intense California sun. You need 100% acrylic latex formulas with high solar reflective values. If your painter doesn’t mention how the sun affects pigment breakdown, they aren’t the right expert for the job Choosing the Wrong Paint Homeowners often see a famous brand name on a bucket and assume it’s high quality. Every major paint company has a cheap version for property managers who just want to flip an apartment. If your contract for the paint job just says Sherwin-Williams or Benjamin Moore without specifying the exact product line (like Emerald or Regal Select), the contractor is likely going to buy the $25-a-gallon bucket instead of the $80-a-gallon bucket. The difference in life expectancy is about five years. Failing to Get a Detailed Written Contract A professional painter will provide an accurate estimate with everything mentioned in detail. It should explicitly state: Exact Paint Brand and Line: Number of Coats Specific Areas Included Clean-up Procedures Choosing the Wrong Sheen Color is subjective, but sheen is functional. Flat/Matte: Great for hiding imperfections, but it holds onto dirt and is harder to clean. Satin/Eggshell: This is the gold standard for exteriors. It has a slight luster that sheds water and resists fading. Semi-Gloss: Usually reserved for trim, doors, and shutters. It’s highly durable but will highlight every dent or scratch in the wood. Not Checking References or Recent Portfolios In the age of digital filters, photos can be deceiving. Don’t just look at a contractor’s website. Ask for the addresses of three homes they painted three to five years ago. Go look at them if you can. Is the paint still vibrant? Is there cracking at the joints? A paint job that looks good the day it’s finished means nothing. A paint job that looks good after three summers in the sun is the sign of a true professional. Not Planning Maintenance After Painting A paint job is a proper maintenance cycle. You extend life by: Yearly washing Sealing small cracks early Touching up exposed areas Cleaning mildew Homeowners who do nothing shorten their paint’s lifespan by years. Wrapping Up Hiring the right team to protect your home’s exterior is an investment in your property’s longevity. While it is tempting to go with the fastest or cheapest option, the reality of home maintenance is that you usually get exactly what you pay for.  By focusing on preparation, demanding high-quality materials, and hiring local experts who understand your specific

8 Mistakes Homeowners Make When Hiring Exterior House Painting Services Read More »

How Do I Clean a Paint Roller​

How Do I Clean a Paint Roller?

If you’ve ever finished painting and stared at a soggy paint roller with paint dripping off it, you’ve probably asked yourself: Should I clean this or just throw it away? Well, you’re not alone. A properly cleaned roller can last multiple projects and give smoother finishes. A poorly cleaned one, on the other hand, will ruin your next coat in seconds. This guide walks you through the professional way, the same approach used in real house painting at San Diego job sites, without shortcuts. Keep on reading! Step-by-Step Guide to Cleaning Your Paint Roller Step 1: Remove Excess Paint First The biggest mistake people make is taking a paint roller with paint still dripping from it straight to the sink. You are just asking for a clogged drain and a massive mess. Scrape it Down: Use a 5-in-1 tool or the curved edge of a putty knife. Run it down the length of the roller over the paint tray to squeeze out the excess. You’ll be surprised how much usable paint is still trapped in the fibers. The Roll-Out: Find a scrap piece of cardboard or a heavy-duty paper bag. Roll the tool until it stops leaving significant marks. The less paint you take to the water, the faster the job goes. Step 2: The Cleaning Process (Water-Based Paints) If you’re using standard latex or acrylic, warm water is your best friend. Slide it Off: Remove the roller sleeve from the frame. If you leave it on, the paint dries inside the tension springs, and the roller will eventually stop spinning smoothly. Submerge and Massage: Fill a bucket with warm water and a few drops of dish soap. Submerge the sleeve and use your hands to work the paint out of the core. Use a Paint Roller Cleaner: For those who paint frequently, a spinning paint roller cleaner tool is a game-changer. These mechanical spinners use force to whip the water and paint out of the fur in seconds. It’s the only way to get the deep fibers truly clean. Step 3: Cleaning Oil-Based Paints If you’ve been using oil-based stains, water won’t help. You’ll need mineral spirits or paint thinner. Fill a small container with the solvent. Agitate the roller in the solvent until the paint thins out. Repeat with a second clean wash of solvent. Make sure to never pour these solvents down the drain. Store them in a sealed jar until the paint solids settle, then reuse the clear liquid. Step 4: Drying How do I clean a paint roller so it doesn’t get crusty? The answer is in the drying. Never lay a wet roller flat on its side. The fibers will mat down and dry in a flat bald spot, making your next coat of paint look streaky. Is a Used Paint Roller Even Worth Saving? If the paint has already started to harden in the fibers, just toss it. A poorly cleaned roller will leave dried flakes on your freshly painted walls, ruining a professional finish. However, if you follow the steps mentioned above immediately after the job, that roller will be ready for the next paint job. Final Thoughts Knowing how to clean a paint roller properly saves money, improves finish quality, and avoids frustrating repainting later. The difference between DIY-looking walls and professional results often comes down to tool care and not just technique. If you’d rather skip the cleanup, prep work, and risk of uneven coats, professional exterior painters handle all of this automatically, and your walls show it. FAQs What is the best way to clean a paint roller after painting? The best way is to first remove excess paint by scraping and rolling it out, then wash the roller with warm water and mild soap for latex paint or mineral spirits for oil-based paint. At American Painting, professionals emphasize immediate cleaning to prevent paint from drying inside the fibers and ruining the roller. Get free estimate now at +1 858 255 4565! Is it worth cleaning a paint roller or should I replace it? Yes, cleaning a paint roller is worth it if done immediately after use. A properly cleaned roller can be reused multiple times without affecting finish quality. American Painting recommends replacing rollers only if paint has hardened, as dried fibers can cause streaks and uneven application. How do you clean a paint roller with dried or hardened paint? If paint has dried inside the roller, it is usually not salvageable. Soaking in warm water or solvent may loosen some residue, but the roller will not perform properly. For professional results, it’s better to replace hardened rollers rather than risk ruining your next coat. Can I clean a paint roller without removing it from the frame? You can, but it’s not recommended. Leaving the roller on the frame traps paint inside the core and can damage the spinning mechanism. Removing the sleeve allows for thorough cleaning, better drying, and longer tool life, especially for repeated painting projects. What is the best method to clean oil-based paint from a roller? Use mineral spirits or paint thinner instead of water. Submerge the roller, agitate to loosen paint, and repeat with clean solvent until fully removed. Proper disposal is important, never pour solvents down the drain. This method ensures deep cleaning of oil-based coatings. How do you dry a paint roller properly after cleaning? After rinsing, shake or spin out excess water and stand the roller upright or hang it to dry. Avoid laying it flat, as this flattens fibers and causes uneven paint application later. Proper drying helps maintain the roller’s shape and ensures a smooth finish next time. Should I hire a professional painter instead of cleaning tools myself? Hiring a professional saves time, ensures proper preparation, and delivers a flawless finish. Professionals handle cleaning, maintenance, and application using advanced tools. For larger or high-visibility projects, expert painters provide better durability and eliminate the risk of streaks or uneven coats.

How Do I Clean a Paint Roller? Read More »

Benjamin Moore Vs Sherwin Williams - American Painting

What is Better Quality, Sherwin-Williams or Benjamin Moore?

When you decide to invest in a professional paint job, you aren’t just paying for a change in color. You are paying for chemistry, durability, and the long-term protection of your home’s surfaces. In the world of premium coatings, two titans dominate the conversation: Sherwin-Williams and Benjamin Moore. If you ask ten different professional painters which brand is superior, you will likely get ten different answers based on regional availability, personal application style, and specific product lines. However, when we look at the chemical composition, ease of use, and real-world longevity, a clearer picture begins to emerge. This guide breaks down the reality of the Benjamin Moore vs Sherwin Williams argumentto help you decide which bucket of paint belongs in your home. The Professional Standard: Is Benjamin Moore a High-End Paint? Before comparing the brands, we must address their reputations. People often ask, is Benjamin Moore high-end paint? The answer depends on what you consider to be high-end. Both companies offer “contractor-grade” entry-level products, but Benjamin Moore has built its entire brand identity around being a slightly more premium, boutique-style manufacturer. Unlike Sherwin-Williams, which operates thousands of corporate-owned stores, Benjamin Moore is sold through independent dealers. By creating their own waterborne colorants that don’t weaken the paint’s integrity, they have solidified their status as a high-end choice for designers and high-end residential contractors. What is Better Quality: Sherwin-Williams or Benjamin Moore? Quality in paint is measured by solids, which are the pigments and binders left behind on the wall after the water or solvent evaporates. Higher solids generally mean better coverage and a more durable film. Benjamin Moore Quality Factors Benjamin Moore is often cited for its incredible leveling properties. This means when the paint is applied, it lies down smoothly, hiding brush marks and roller textures better than many competitors. Their flagship lines, such as Aura and Regal Select, are widely considered the gold standard for rich pigment depth. The paint film remains hard and resistant to surfactant leaching (those oily streaks you sometimes see in bathrooms). Sherwin-Williams Quality Factors Sherwin-Williams is the workhorse of the American painting industry. Their high-end lines are chemically engineered for extreme durability. While some professionals argue that Sherwin-Williams requires a slightly more skilled hand to avoid lap marks, their top-tier products are virtually indestructible once cured. In the battle of Sherwin-Williams vs. Benjamin Moore, the better quality often depends on the goal. If you want the most beautiful, smooth finish for an interior living room, Benjamin Moore often wins. If you want a rugged, scrubbable exterior that can survive a harsh sun exposure or coastal moisture, Sherwin-Williams’ top-tier lines are hard to beat. The Cost Factor: Is Benjamin Moore More Expensive Than SW? Price is often the deciding factor for homeowners, but it is also the most misunderstood aspect of the industry. Retail Pricing: If you walk into a Benjamin Moore dealer and a Sherwin-Williams store as a DIYer without a discount coupon, Benjamin Moore’s premium lines usually carry a higher price than Sherwin-Williams’ equivalents. The Discount Factor: Sherwin-Williams is famous for its aggressive marketing due to its corporate culture. They frequently run 30% to 40% off sales. Without these sales, Sherwin-Williams can actually feel more expensive than it should be. Ultimately, while the sticker price on a gallon might be higher, you have to consider yield. If a high-quality paint covers in two coats while a cheaper paint takes three, the expensive paint is actually the cheaper option. Durability and Lifespan: Does Benjamin Moore Paint Last Longer Than Sherwin-Williams? When you spend thousands on a professional paint job, you want it to last you for at least a couple of years. The reality is that at the highest levels of both brands, the lifespan is nearly identical, provided the surface preparation was done correctly. Paint failure is almost always a result of poor prep, not poor paint. However, there are some factors to consider: Interior Longevity: Benjamin Moore tends to hold their sheen longer. In high-traffic hallways, the film stays looking new under repeated scrubbing. Exterior Longevity: Sherwin-Williams products are specifically formulated with high-build technology. They create a thicker coating that expands and contracts with the temperature. In many professional circles, Sherwin-Williams is the preferred choice for San Diego exteriors because of its proven track record against UV degradation. Color Retention: Benjamin Moore’s paint technology is superior for color retention in dark colors. If you are painting your house a deep navy or forest green, Benjamin Moore is less likely to fade into a chalky grey over five years. Comparing the Specific Product Lines To truly understand the difference between the two, you have to compare them accordingly. You cannot compare a budget Sherwin-Williams “Property Management” paint to Benjamin Moore Aura. The Ultra-Premium Tier Benjamin Moore Aura ($95-$115 per gallon): Known for “Color Lock” technology. It is thick, dries incredibly fast, and offers the richest colors in the industry. Sherwin-Williams Emerald ($100-$115 per gallon): Exceptional hide and washability. It is a dream to apply for professionals and offers a very sleek finish. The Professional Standard Tier Benjamin Moore Regal Select ($75-$85 per gallon): This is perhaps the most loved paint by contractors. It is reliable, easy to use, and has a beautiful finish. Sherwin-Williams Duration ($85-$98 per gallon): A heavy-bodied paint that is excellent for hiding small imperfections in the drywall or siding. The Entry-Level Tier Benjamin Moore Ben ($45-$58 per gallon): A solid choice for low-VOC, budget-friendly painting. Sherwin-Williams SuperPaint ($60-$80 per gallon): A classic, reliable paint that has been a staple in the industry for decades. It is a major misconception among homeowners that you can just color-match the paint with a cheaper brand and cut costs. That is almost an impossible task because both the brands in question use different tinting systems. The colors will never be 100% identical. The way the light hits the pigment is different. So, if you happen to love a color by a specific brand, buy it without any doubts. Bottom Line: Which

What is Better Quality, Sherwin-Williams or Benjamin Moore? Read More »

📞 Call Now — Free Estimate